Embarking on a home renovation is equal parts exciting and daunting. Amidst the design dreams and dust clouds, a practical question often arises: should you rent or buy the tools for the job? While renting specialty equipment for a one-time task is a no-brainer, there are several common power tools where the math overwhelmingly favors opening your wallet. The break-even point—where the total rental costs surpass the purchase price—comes surprisingly fast. This guide dives into three specific tools that are smarter long-term investments for the avid DIYer or serial home improver, saving you money and granting the convenience of having them ready in your garage for future projects.
📊 The Rent vs. Buy Decision Framework
Before we get to the specific tools, let's establish a quick framework. The decision to rent or buy hinges on a few key factors:
Cost of Rental vs. Purchase
· Rental: Daily/Weekly rates, delivery/pickup fees, and potential damage waivers.
· Purchase: Initial sticker price, but $0 cost for every subsequent use.
Frequency of Use
· How often will you use it for this project? (e.g., multiple days/weeks).
· How likely are you to need it for a future project in 1-3 years?
Tool Longevity & Storage
· Will a consumer-grade tool suffice, or do you absolutely need pro-grade?
· Do you have the space to store it properly?
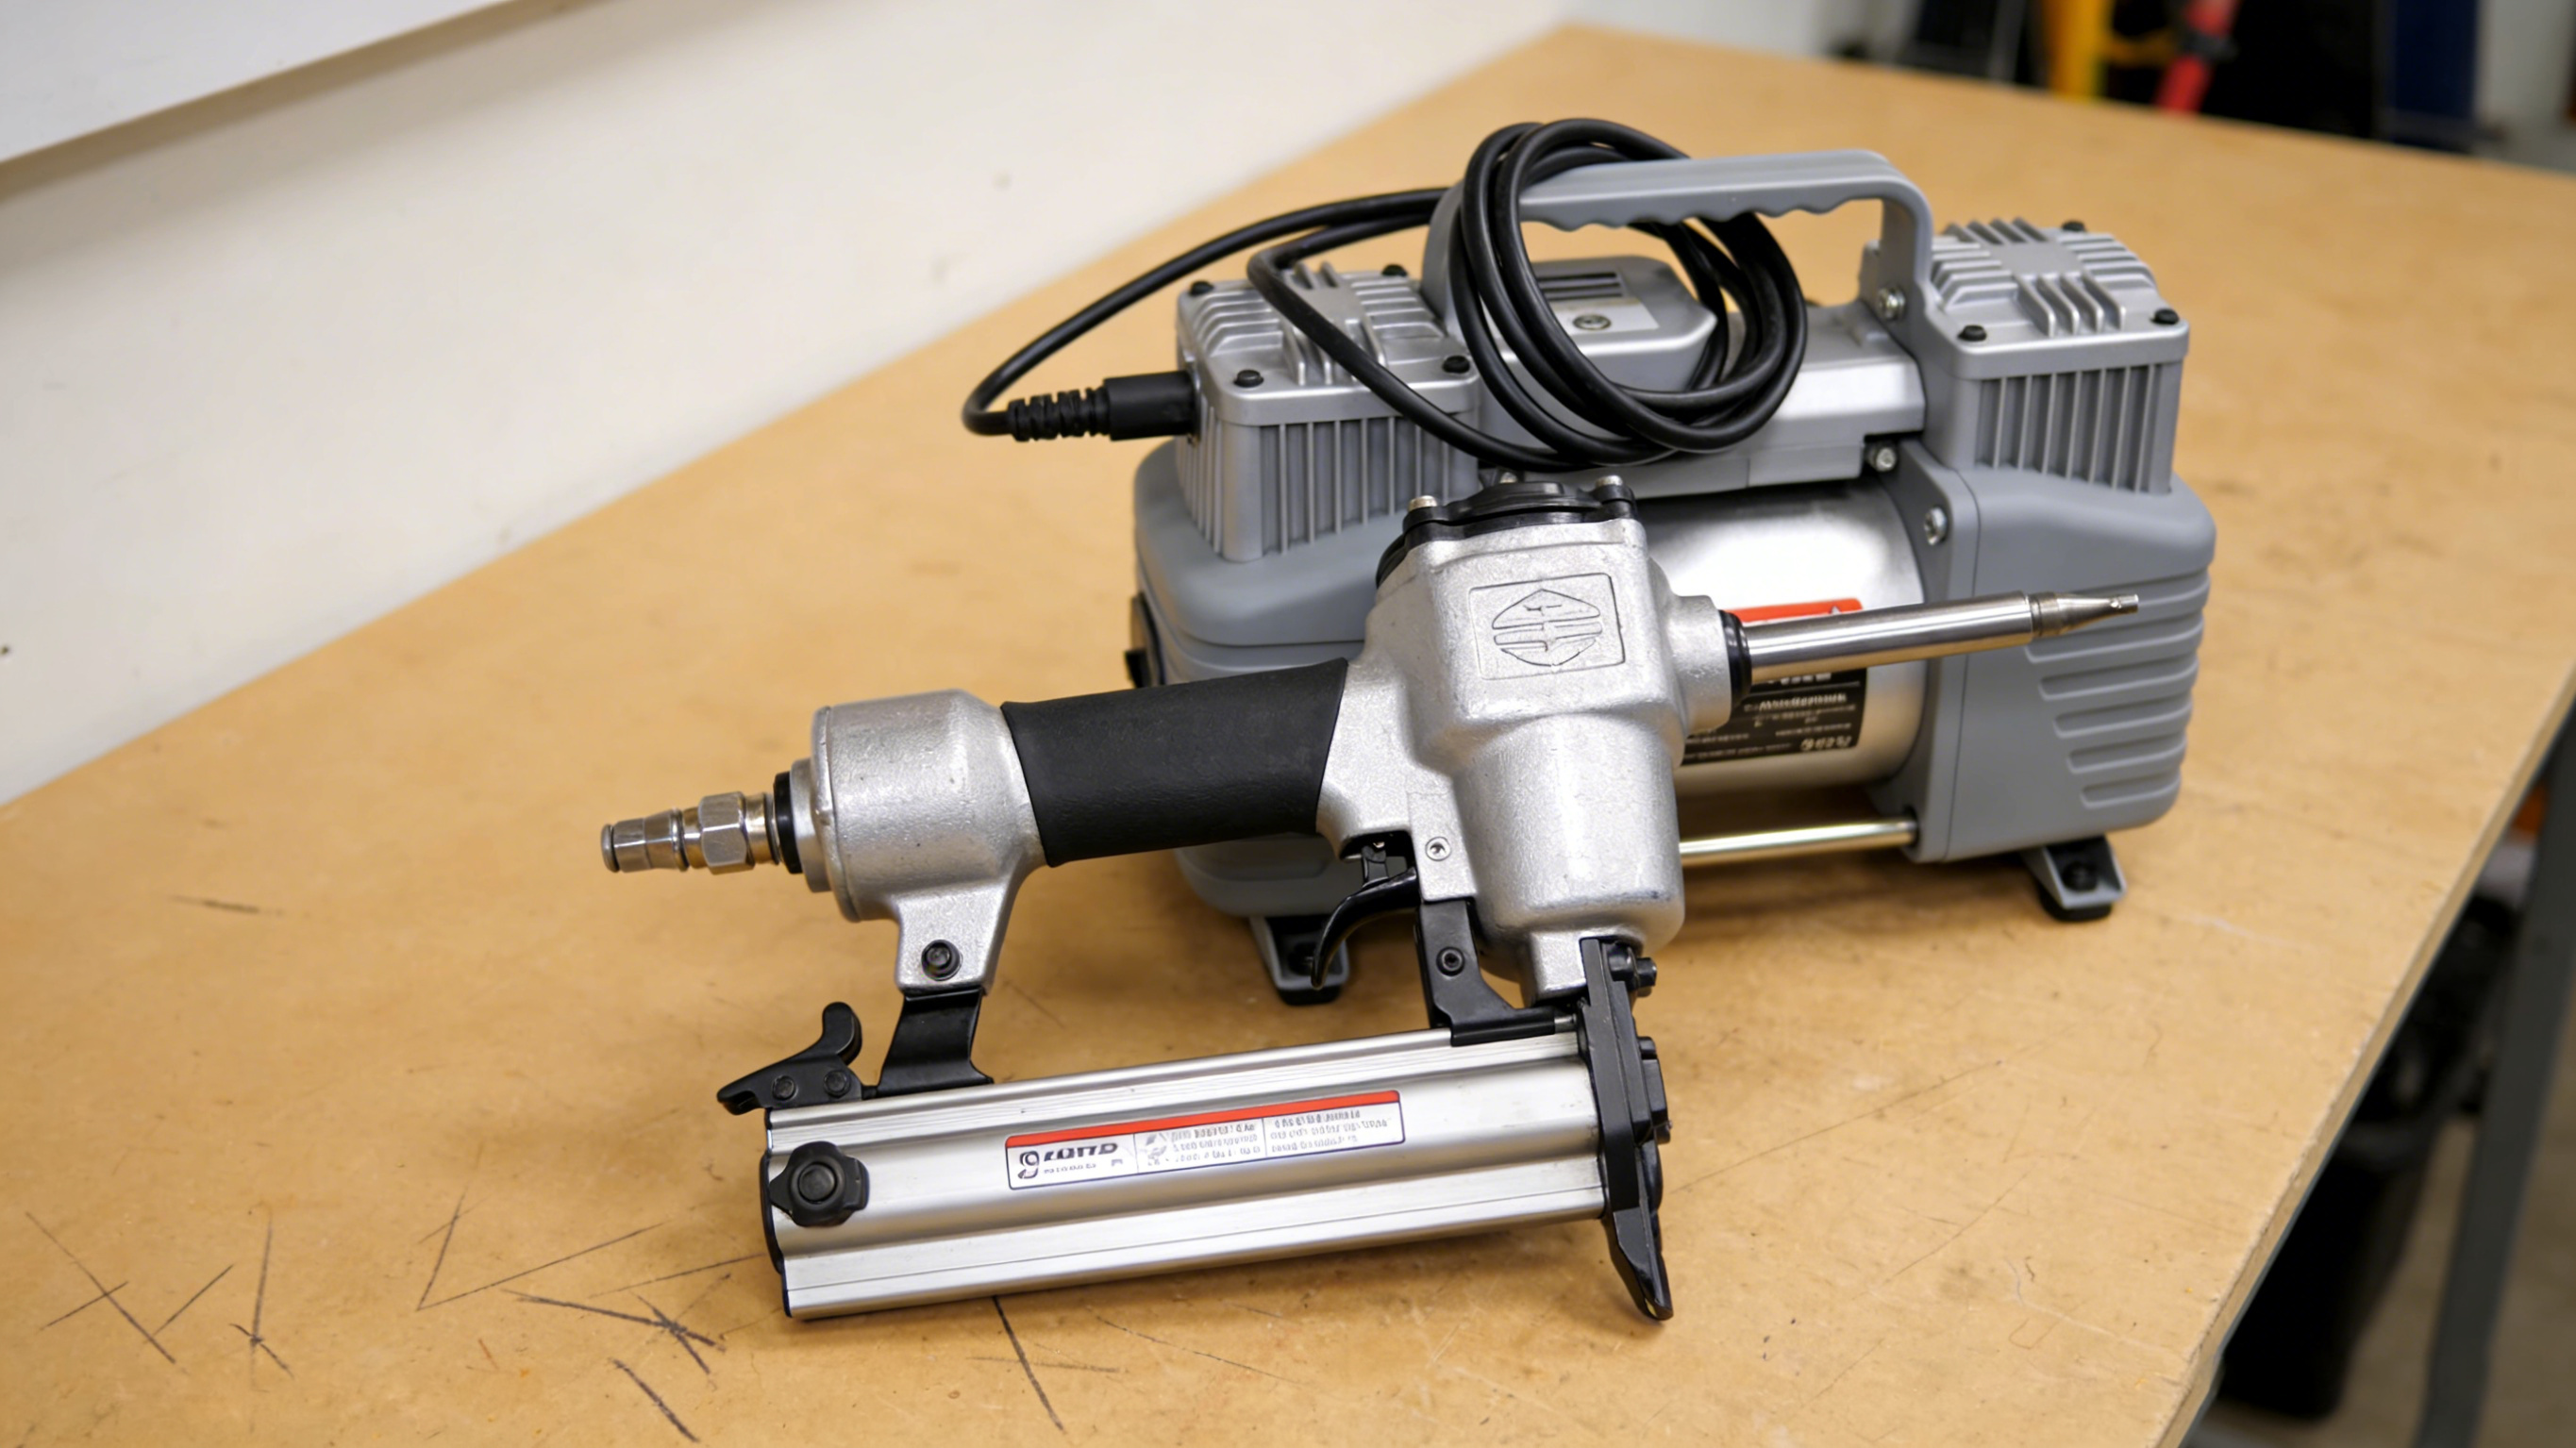
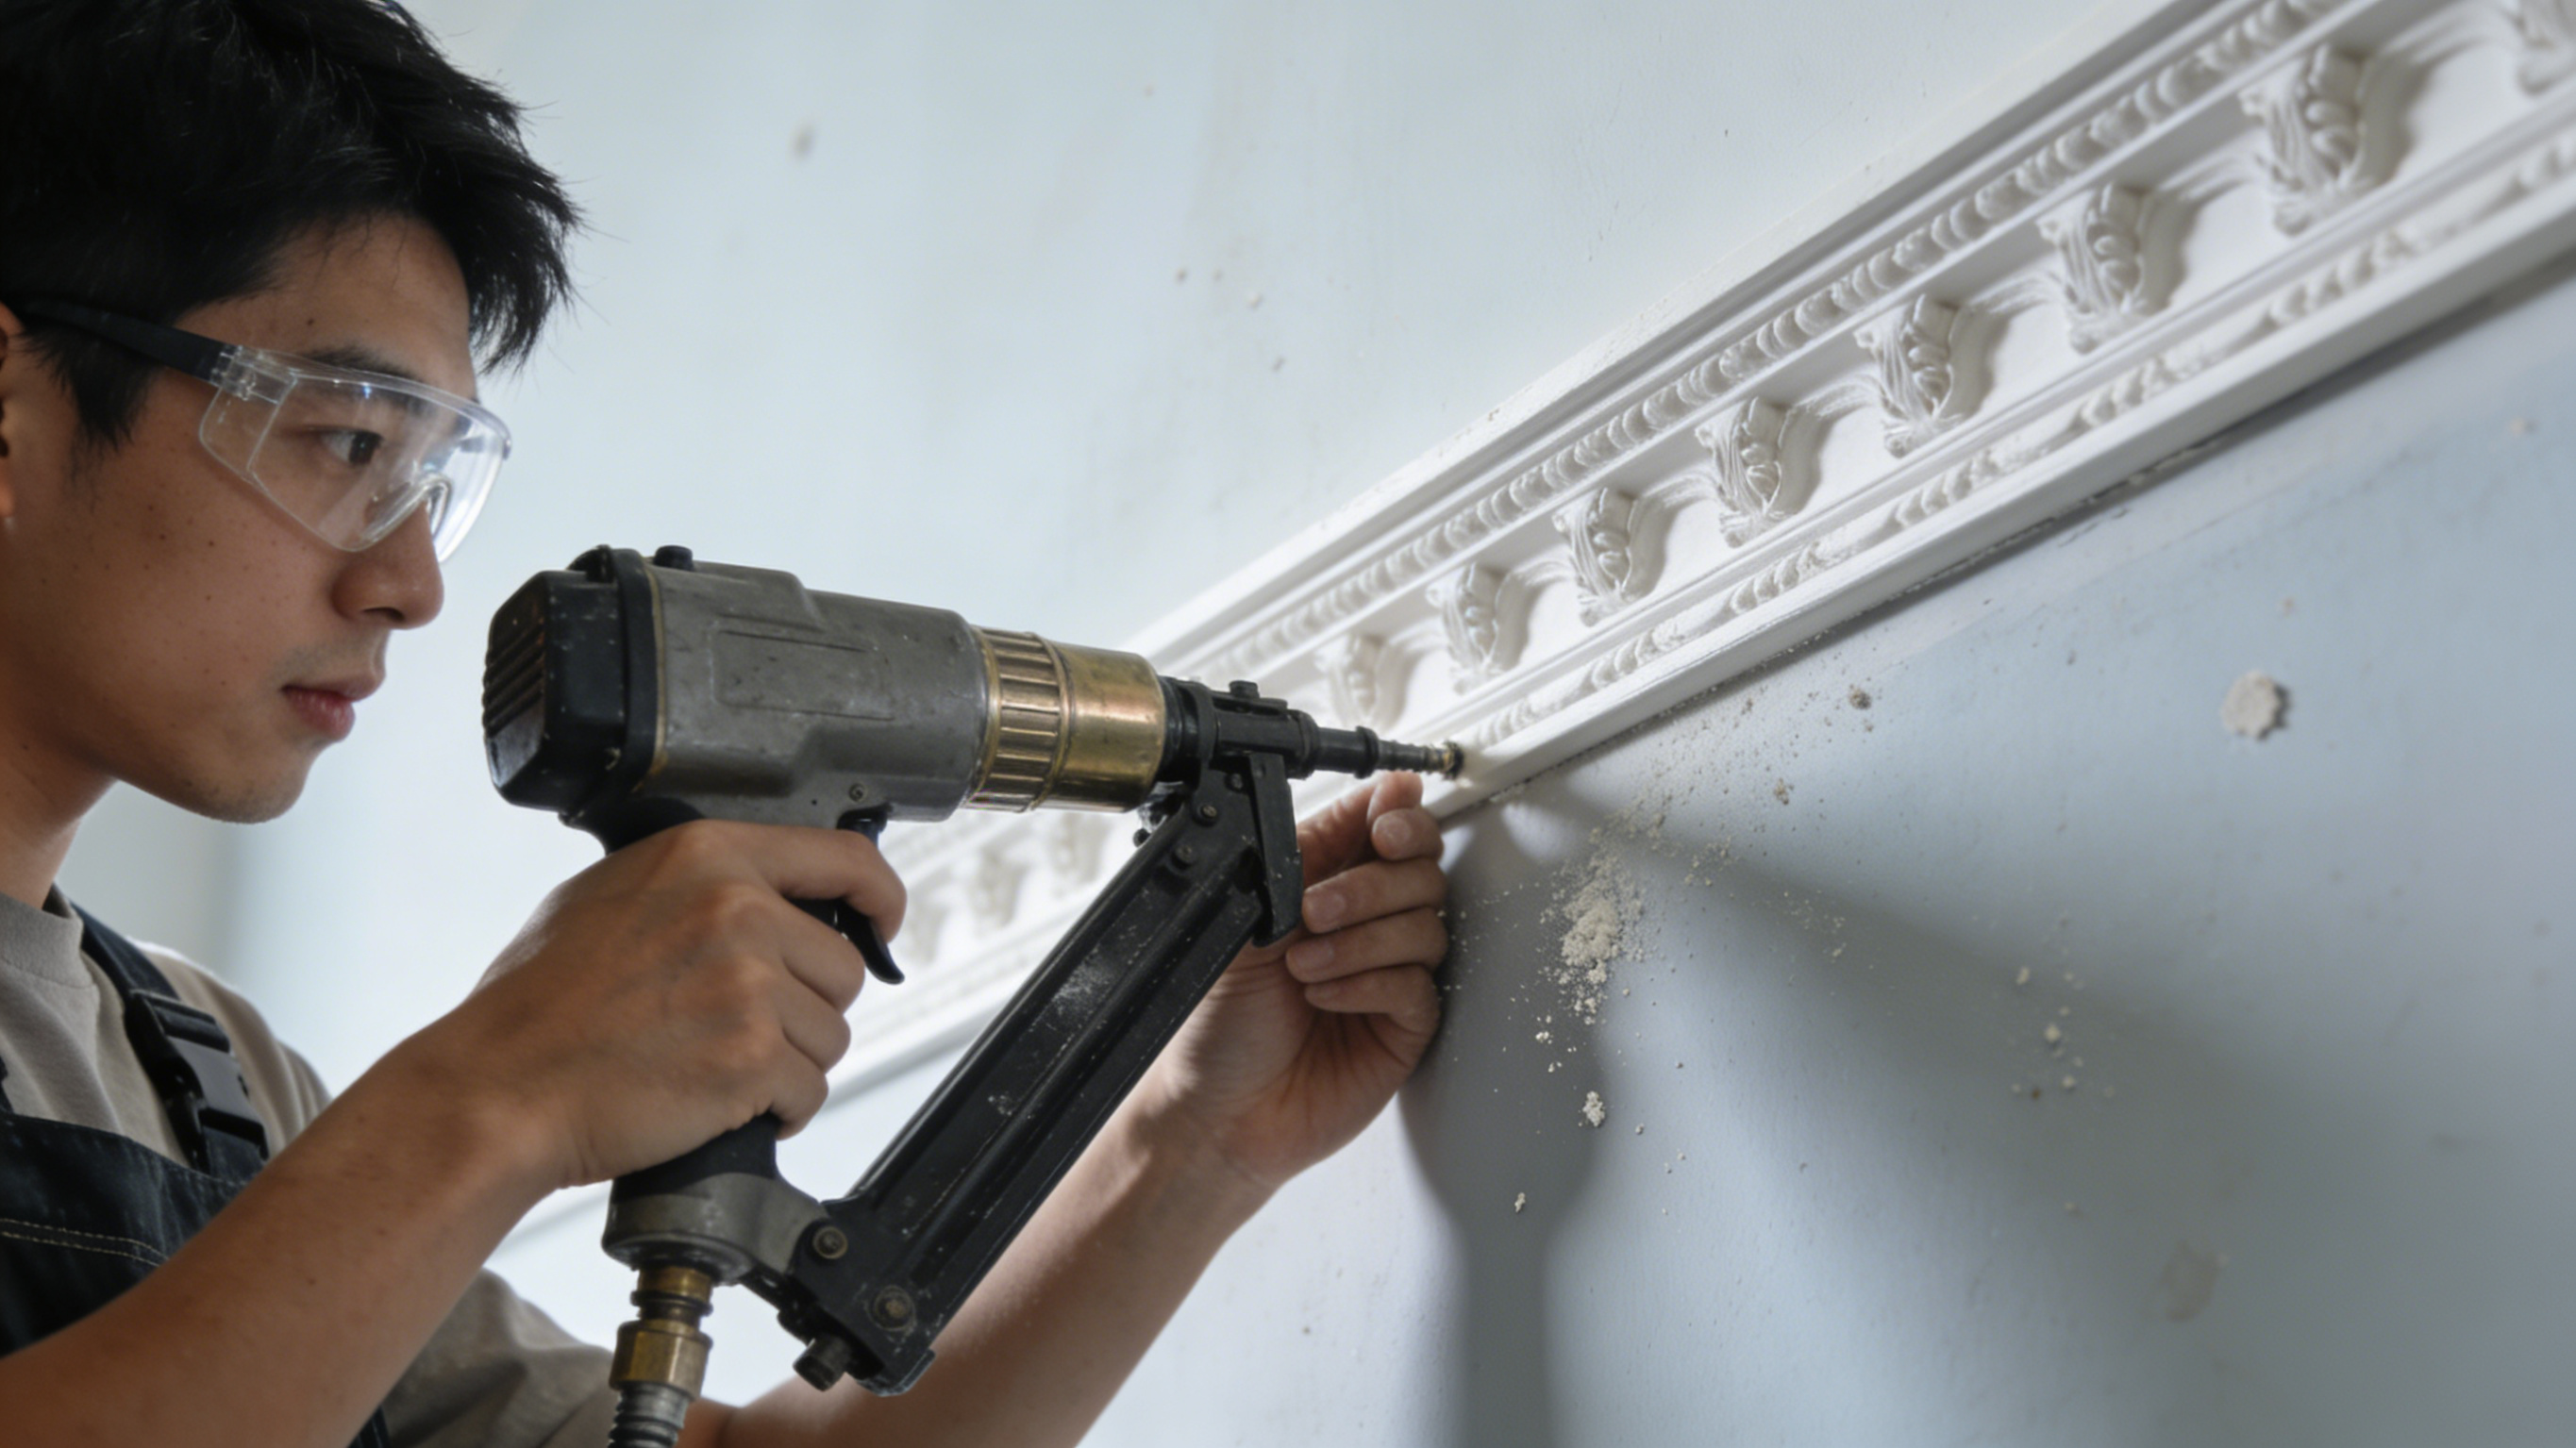
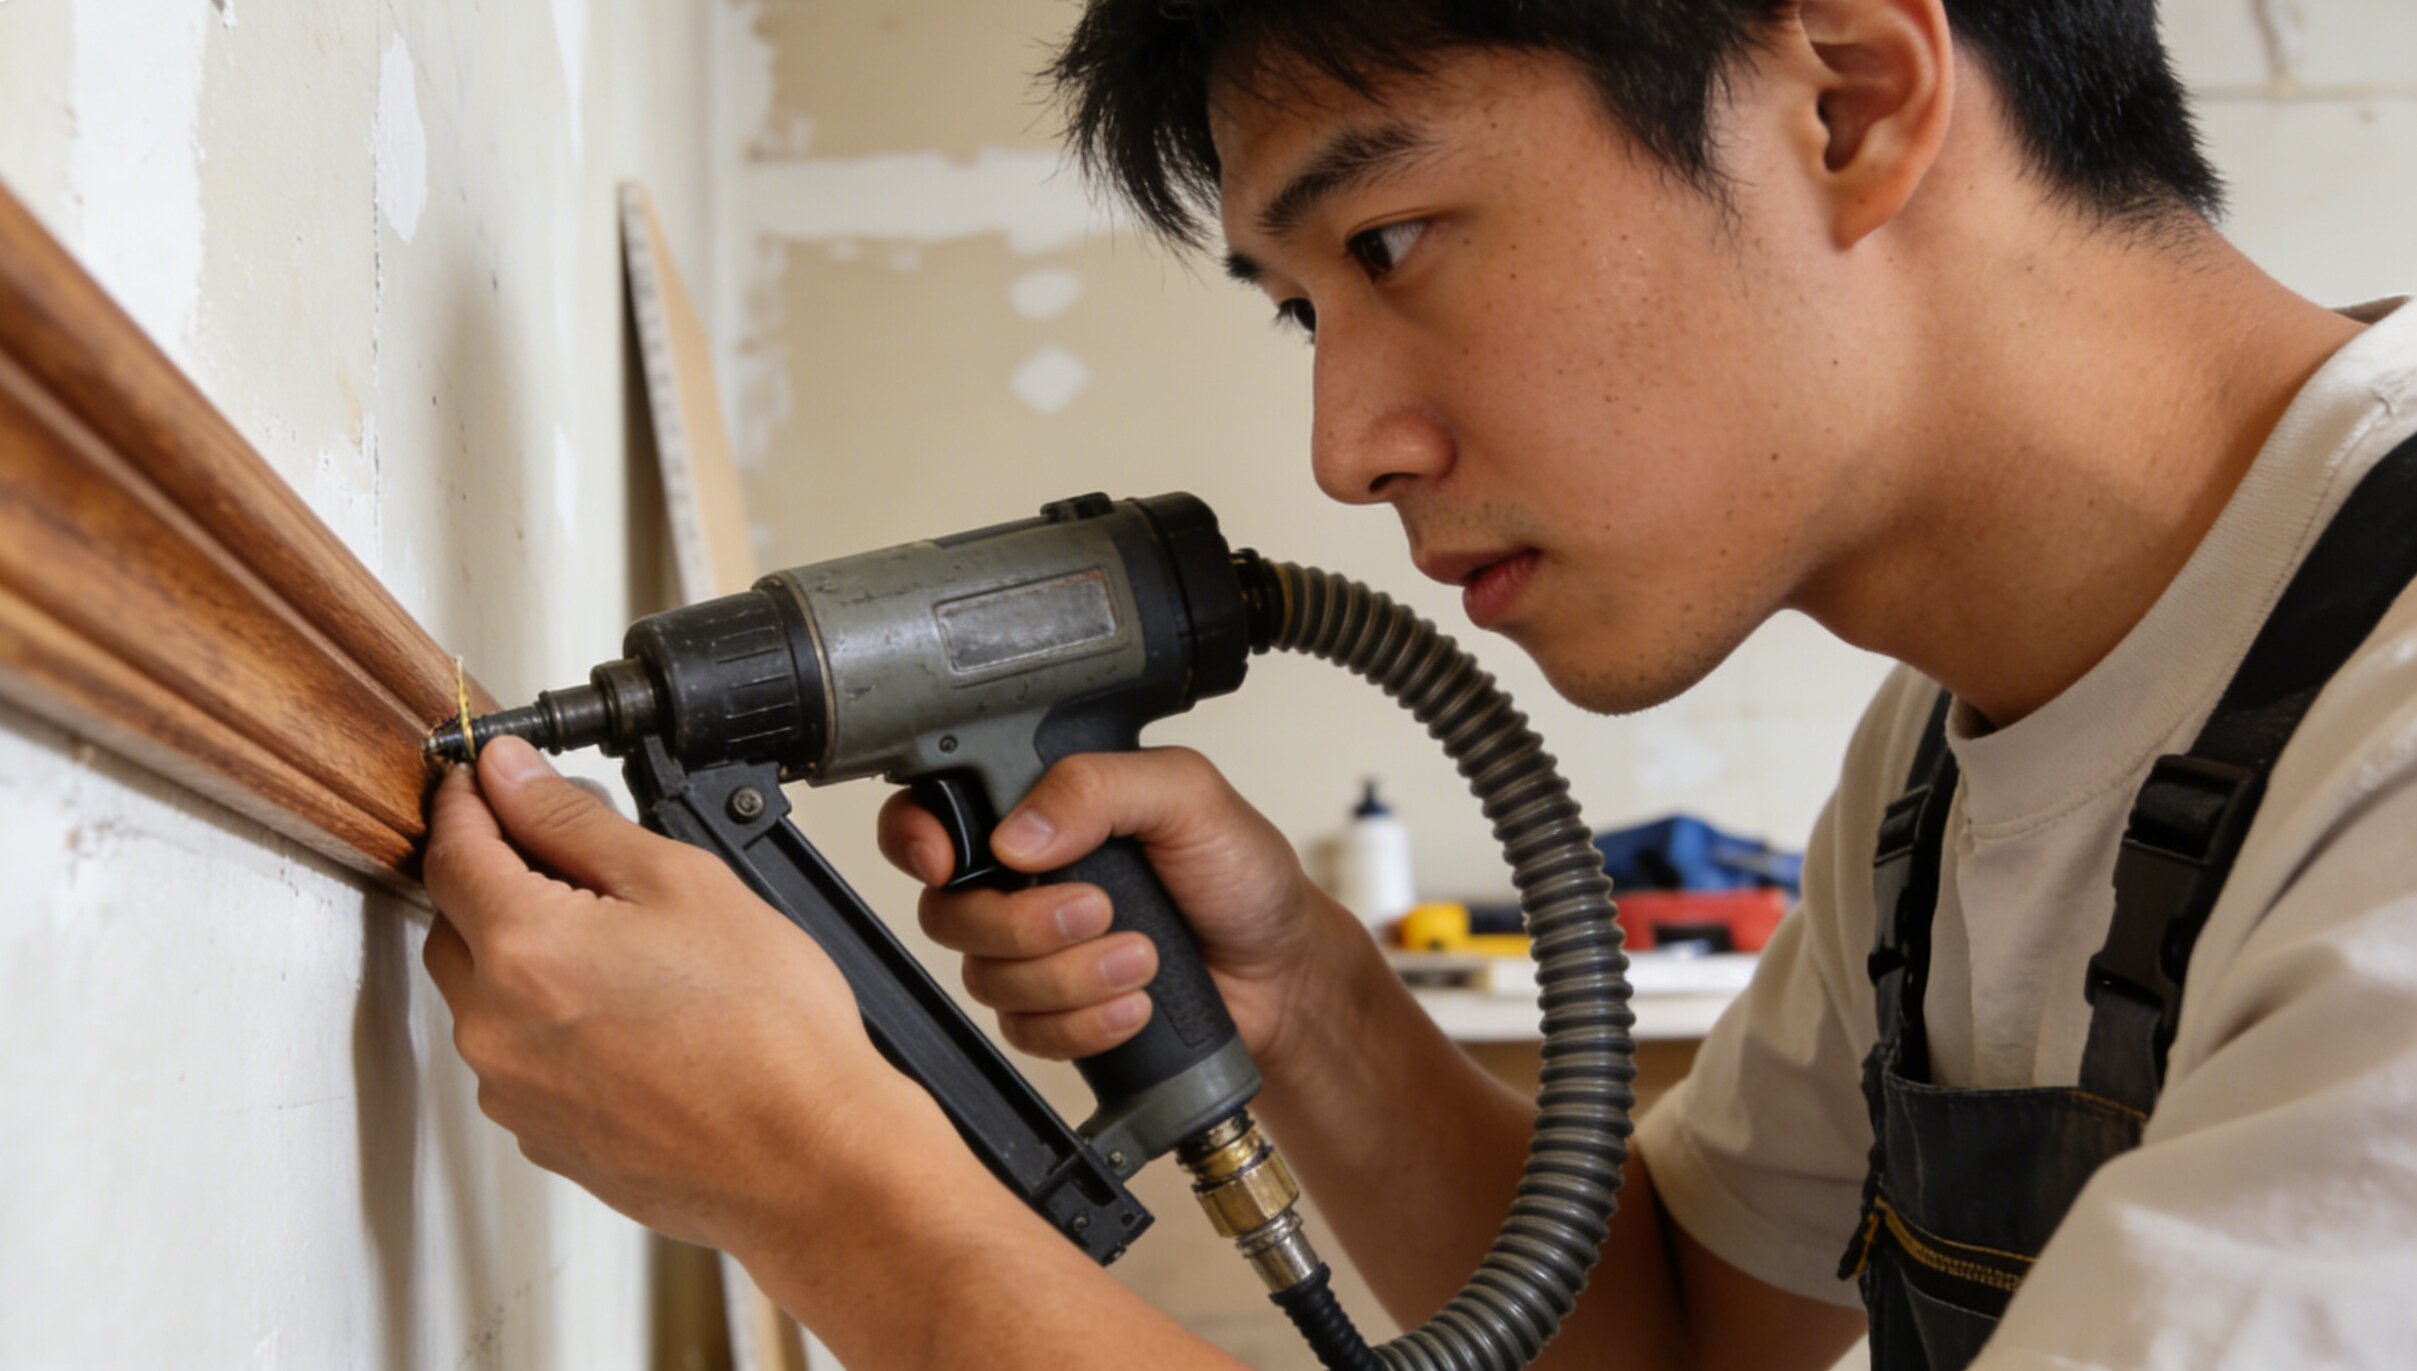
🔨 Tool #1: The Pneumatic Nailer/Stapler (Framing, Finish, or Brad)
A pneumatic nailer is a renovation powerhouse, used for everything from building decks (framing nailer) to installing trim and cabinetry (brad/finish nailer). Renting seems logical, but the economics quickly tilt toward purchasing.
Why Renting Becomes Expensive
1. Multi-Day Projects: Trim work, decking, or building a shed rarely take just one day.
2. The Compressor Combo: You almost always need to rent the air compressor too, doubling the rental fee.
3. Example Cost Breakdown:
· Renting a finish nailer + compressor: ~$40-$60 per day.
· A 3-day weekend project: $120-$180 in rental fees.
· Purchasing a reliable brand brad/finish nailer kit (with compressor): $200-$350.
Advantages of Buying
· Break-Even Point: Often just 2-3 project days.
· Convenience: Tackle small repairs instantly—picture frames, loose trim, DIY crafts.
· Project Readiness: No scheduling rentals, just grab and go.
What & When to Buy
1. For Trim & Finish Work: An 18-gauge brad nailer or 16-gauge finish nailer combo kit is ideal.
2. For Heavy Framing: If building a shed or deck, a framing nailer is worth it if you foresee more than 2 days of use across multiple projects.
3. Key Purchase Considerations: Look for a kit that includes a decent compressor, multiple nail sizes, and tools. Brands like DeWalt, Bostitch, or Metabo HPT offer great value.
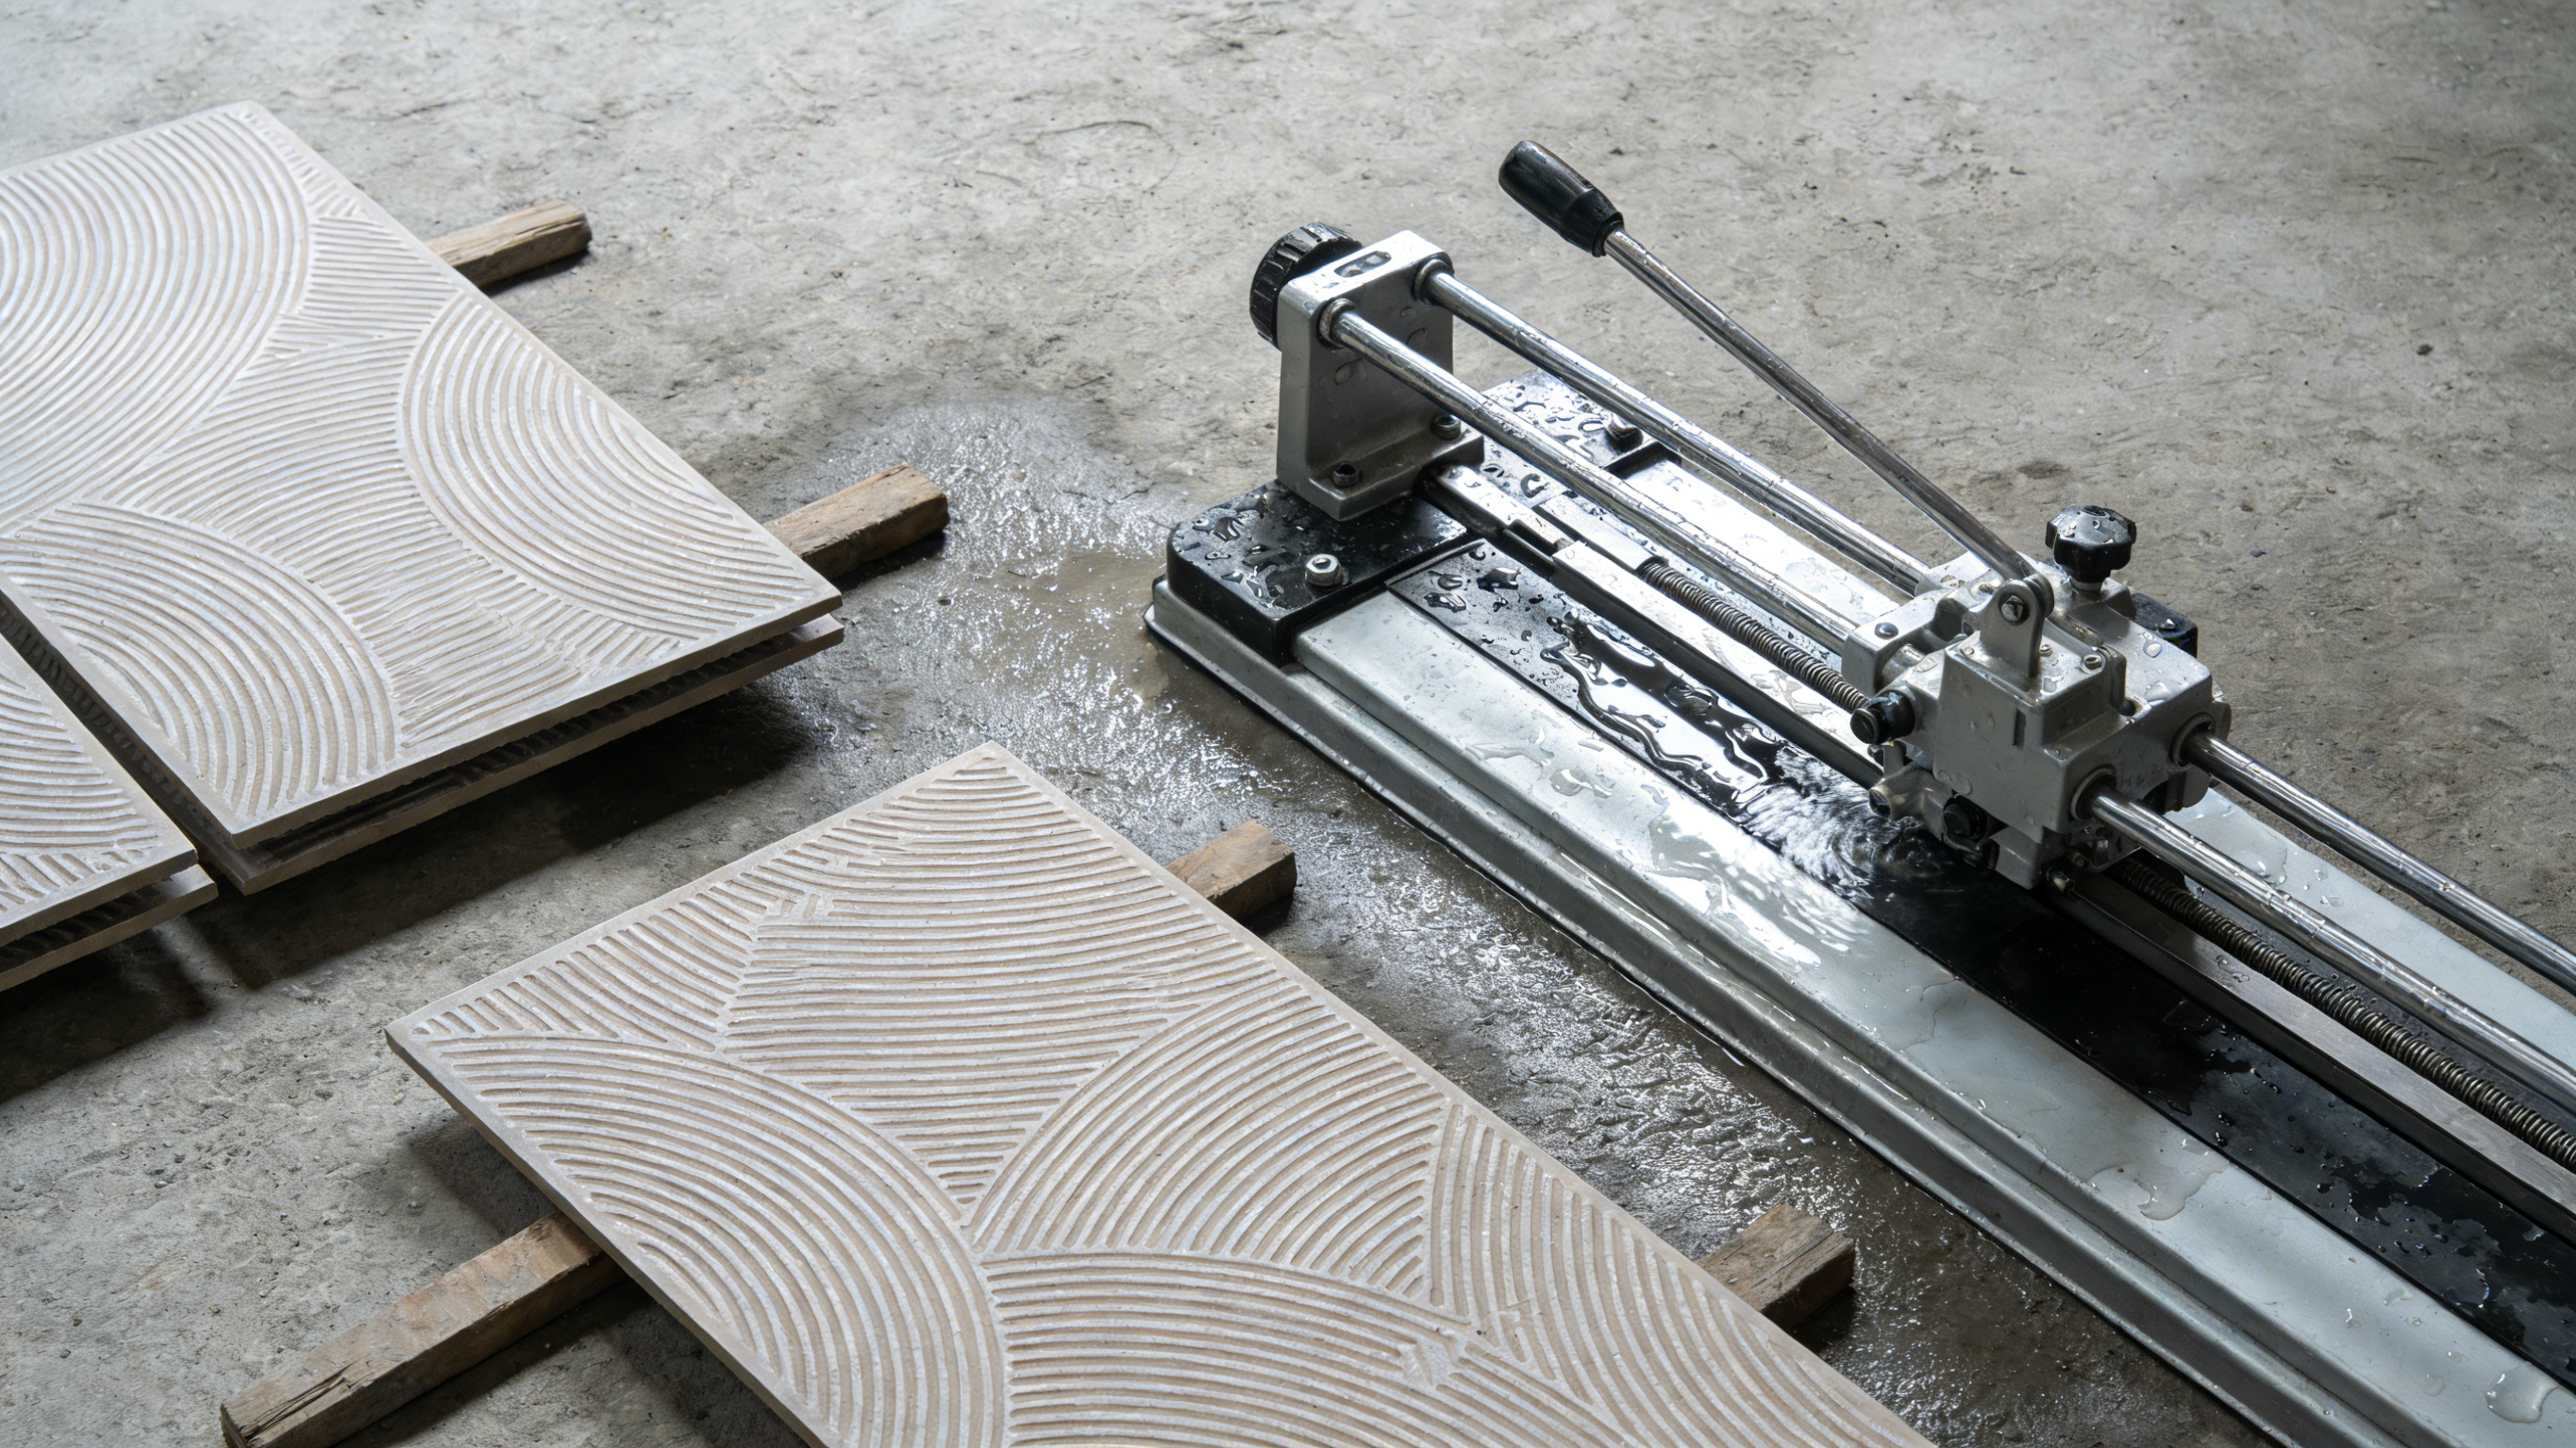
⚙️ Tool #2: Wet Tile Saw
Laying tile is a classic DIY project that can save thousands. The essential tool is a wet tile saw, which uses a diamond blade and water to make clean, chip-free cuts. While bulky, buying one is frequently more economical.
The Rental Math for Tile Projects
Tiling is slow, meticulous work. You don't just cut all tiles at once; you make cuts as you fit pieces throughout the project.
1. Extended Rental Period: A bathroom or kitchen backsplash can easily take a DIYer 3-7 days.
2. High Daily Rates: Wet tile saws rent for $50-$80+ per day.
3. Cost Scenario:
· A 5-day tile project: $250-$400 in rental costs.
· Purchasing a quality 7-inch contractor-style tile saw: $250-$400.
Advantages of Buying
· Zero Time Pressure: Work at your own pace without worrying about daily rental fees mounting.
· Practice Makes Perfect: You can practice cuts on spare tiles.
· Future Use: Bathroom floors, kitchen backsplashes, fireplace surrounds—tile projects often come in series.
Disadvantages & Mitigation
· Storage: They are large. Consider a compact, foldable stand model or plan storage space.
· Cleanup: Requires water management. Use in a garage or on a driveway with a tarp.
Buying Recommendation
For most DIYers, a 7-inch sliding wet tile saw is the sweet spot. It can handle large format tiles (by sliding the tray) and is widely available from brands like SKIL, DeWalt, or RIDGID in the $300-$500 range—often the cost of one long rental.
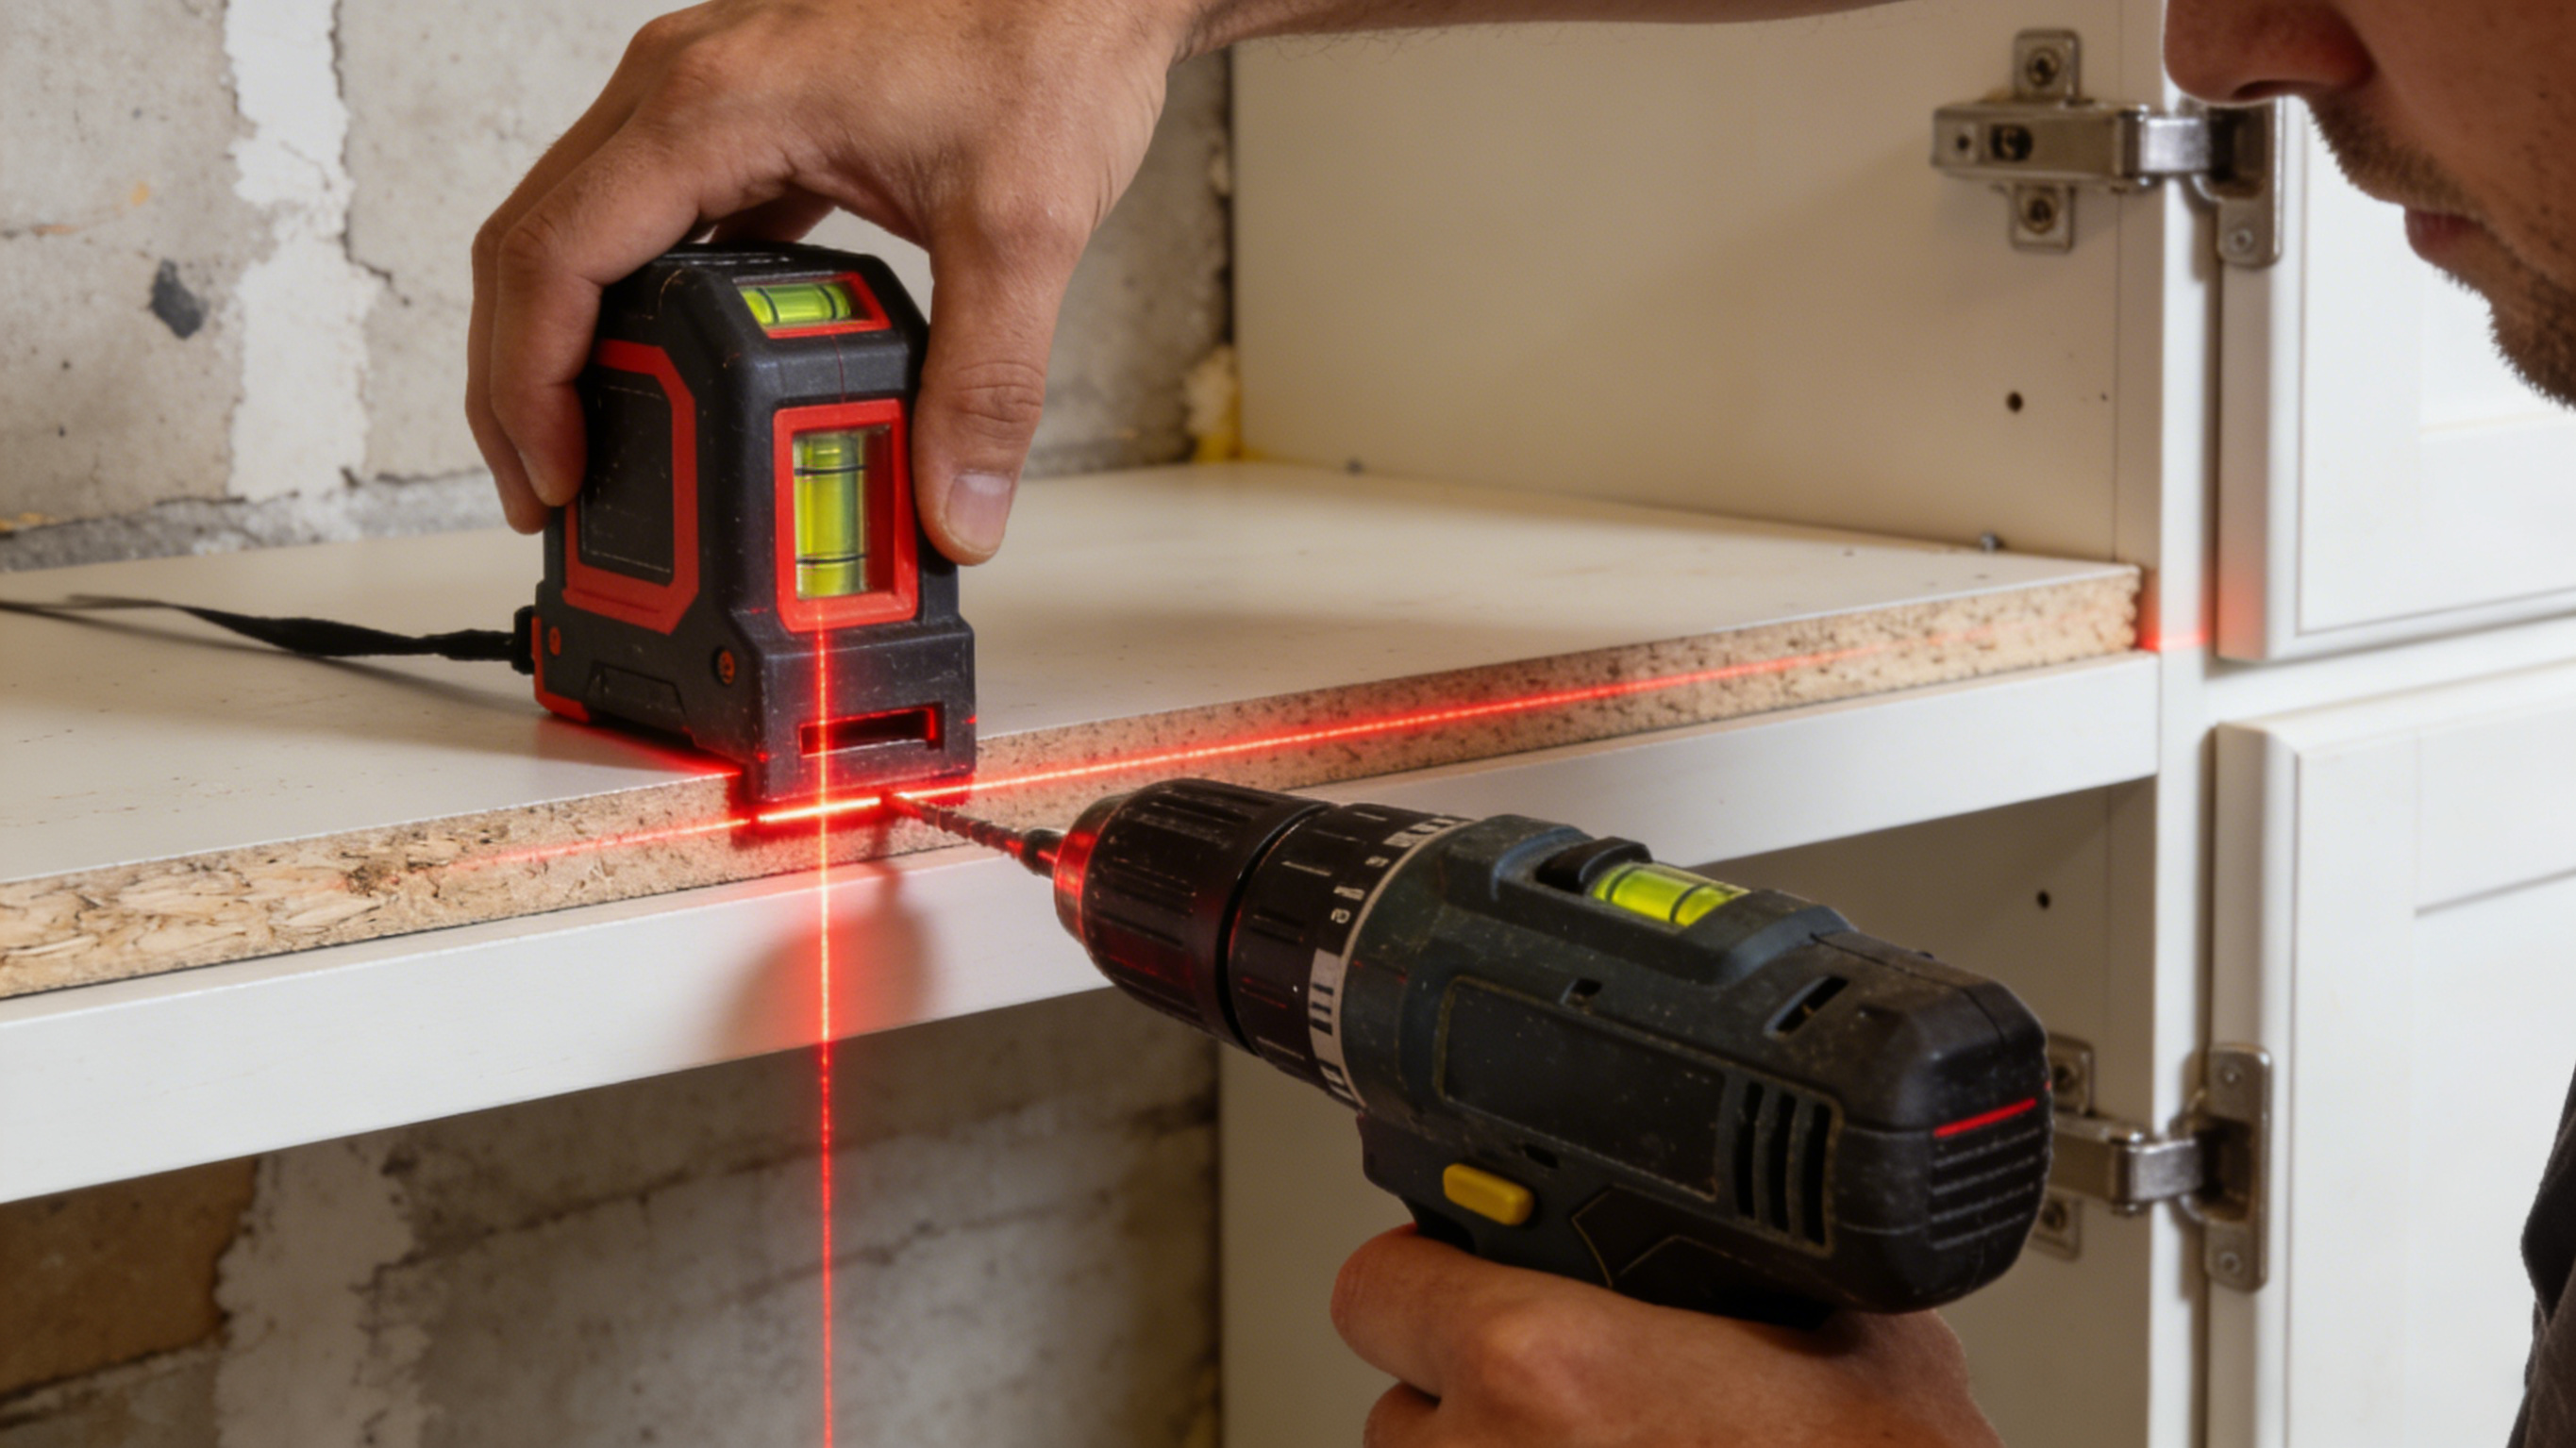
📐 Tool #3: Laser Level (Cross-Line or Rotary)
This might be the most surprising entry. Laser levels feel like "specialist" tools, but for renovation work involving alignment—hanging cabinets, laying tile, installing wainscoting, building decks—they are game-changers. Renting precision electronics is rarely cost-effective.
The Precision & Time-Saving Argument
A laser level isn't just a luxury; it's a massive time-saver that improves accuracy.
1. Versatility: Used in almost every trade: framing, electrical, plumbing, tiling, painting.
2. Rental Irrationality: High-quality lasers rent for $30-$60/day. A complex project might need it for multiple stages over a week.
3. Ownership Value: A good cross-line laser can be purchased for $100-$200. The peace of mind and constant availability are worth the investment.
Advantages of Buying
· Frequent Mini-Uses: Hang a gallery wall? Align shelf brackets? Check floor level? It's a 30-second job with your own laser.
· Improved Project Quality: Straighter lines, level cabinets, perfectly aligned tile—it makes your work look professional.
· Durability: Modern consumer lasers are surprisingly rugged for job site use.
What Type to Buy
1. For Interior Renovations: A self-leveling cross-line laser (projects vertical and horizontal lines) is perfect for walls, tile, and cabinetry. ($100-$150).
2. For Larger Spaces/Outdoors: Consider a green laser (more visible than red) or a dot laser with a receptacle detector for transferring points over long distances.
3. Must-Have Feature: Ensure it has a mount or tripod thread. A magnetic pivoting base is incredibly useful for attaching to metal studs or ducts.

✅ Final Verdict & Smart Shopping Tips
The common thread with these three tools is their utility across multiple phases of a renovation or across multiple future projects. The rental costs accumulate fast, while ownership provides perpetual, stress-free access.
When Renting is Still the Smarter Choice
· Extremely Specialty Tools: Concrete breakers, industrial floor sanders, sewer snakes.
· Very High-Cost Pro Tools: Large skid-steer loaders, ditch witches, boom lifts.
· The "One-and-Done" Test: If you are 99% sure you will never, ever use the tool again.
Tips for Buying Wisely
1. Buy Mid-Range, Not Cheap: Avoid the absolute budget brands for power tools. Reliable mid-tier brands (Ryobi, Skil, Hercules) offer excellent value for DIYers.
2. Consider Cordless Ecosystems: If you already own cordless tools from a brand (like DeWalt, Makita, or Milwaukee), see if they offer the tool within that battery system. It's a huge convenience.
3. Look for Package Deals: Kits that include the tool, case, batteries (if cordless), and essential accessories often provide the best value versus buying piecemeal.
4. Factor in Resale Value: Quality tools hold value. You can often sell a well-maintained tool for 50% of its original price years later, something you can't do with rental receipts.
In the end, prepping for a renovation is about smart resource allocation. By purchasing these three tools—the pneumatic nailer, wet tile saw, and laser level—you're not just spending money; you're making a strategic investment that will pay for itself after the first major project and continue to deliver dividends in capability, convenience, and cost savings for all your future home improvement adventures.